Pre-Order My Newest Book!

I’m pleased to announce that my book, Grow Curious: A Journal to Cultivate Wonder in Your Garden, is now available for pre-order and will be published with Chronicle Books.

The day before we went into the first lockdown I signed a contract with to remake the Grow Curious book I first self-published with reader support via Kick Starter.

At the time, seemed so far away. Well, here we are, just until the release date, in a world I never imagined.

While the two books share a similar title, this is not a reprinting. To begin, this book has a completely different look. It’s in full colour and Davin Risk redesigned it and created all new, original watercolour artwork. The next big difference is that it’s a journal that you can work in. There’s lots of space set aside so you can draw and write alongside the prompts, yet it is still content-rich. It was really important to me to maintain that balance. I have repurposed some of the original activities. However, because times change and so have I, I rewrote and edited everything. There’s also a lot of brand new material, including new activities, prompts, essays, and introductions.

The pandemic has launched us all into a world in which we crave connection to nature more than ever. Yet, what has become even more evident is how many lack access. For that reason I pushed even harder to make a book that felt as accessible and inclusive to people living in apartments without outdoor space as those with back gardens.

Pre-order from your local independent bookseller or any of the following:

Chronicle Books

Indiebound

Amazon

Book City (Toronto, Canada)

UK BookShop

Barnes and Noble

Since some of you will be pre-ordering a copy to gift, we’ve made a card that you can send as a digital file or print.

PDF

PNG

Pre-orders are extremely important to the release of small titles like this. If you’re an independent bookseller who will be carrying the book, please reach out so I can add it to the sellers list I’ll be sharing via social media.

The Secret Formula for Knitted Baby Hats That Fit Every Time

Whether you’re knitting hats to donate to babies in the NICU or for people you love, hats are a great, practical gift for babies and new parents. One of the trickiest parts of knitting for babies is sizing. Keep reading to learn about baby hat knitting sizes.

When I had my first baby, I had a hard time figuring out what clothes he would need in each size per season. Would a baby born in the spring need 6- or 9-month clothing in the winter?  Some babies are big and some babies are small, and baby’s heads grow the fastest in the first year.

How will you know what size will fit best?

To help you whip up baby hats of all sizes, here is a little chart to help you determine what size hat you’d like to make so you don’t end up making a hat too big or too small when winter rolls around.

Average Baby Head Measurments By Size

  • Preemie head size: 9-inch circumference and 4 inches tall
  • Newborn size: 11-inch circumference and 5 inches tall
  • 0-3 month size: 13-inch circumference and 6 inches tall
  • 3-6 month size: 16-inch circumference and 7 inches tall
  • 6-9 month size: 18-inch circumference and 7.5 inches tall
  • 12 month size: 20-inch circumference and 8 inches tall
  • 24-4T size: 21-inch circumference and 8.5 inches tall

Using the above sizing information, here is the formula to determine how many stitches you need to cast on in the round to knit that baby hat size:

Circumference (in inches) x stitches per inch = cast on number

If you’ve knit several baby hats before, you can use the above formula with any weight of yarn and appropriate needle size. Knit until you get half an inch shorter than the desired hat. Bind off by k2tog every five stitches until you have one stitch left on your needles. Then, pull the yarn through the last loop and weave in the ends to your hat.

You may need to increase (every two stitches k2tog) or decrease (every 10 stitches k2tog) the number of stitches you need to knit together as a decrease depending on the yarn you’re using.

What Size Baby Hat Should You Knit?

  • For a baby due in the spring, knit a size 6-9 month to wear this year, or a size 18-24 month for next year.
  • For a baby due in the summer, knit a hat in 3-6 month size to wear this year, or 18-24 month for next year.
  • For a baby due in the fall, knit a hat in 0-3 or 3-6 month size to wear this year, or 24-month size for next year.
  • For a baby due in the winter, knit a hat in 0-3 or 3-6 size to wear this year, or 12-month or 24-month size for next year.

Last-Minute DIY Gifts for Everyone on Your List

The pressure is on when you try to make DIY gifts for everyone on your list. The gift-giving season can quickly turn into a nightmare when you either forget to DIY a gift for someone or have no idea what to make. Both of these things seem to happen to me every Christmas.

The last two people on my list each year are my dad and my brother. I buy them the same things every year: sports memorabilia or grooming products. After decades of shave gel and University of Kentucky bumper stickers, I’m sure they’d both like something different. Why shouldn’t they get in on the handmade party, too?

The good news is that you can make DIY gifts for everyone on your list, even those who are toughest to buy for. No matter how you stitch it — knitting, crochet, sewing, or quilting — Craftsy has great DIY gifts for everyone on your list.

Knit: Ramble On Mittens

Unless you live in a very warm climate, everyone on your list could benefit from a pair of cozy mittens. This pair works for guys and gals, and the pretty cables make them a little more unique than your usual mittens. Advanced beginner knitters will have no problem completing this in-the-round pattern.Get the Ramble On Mittens knitting pattern here.

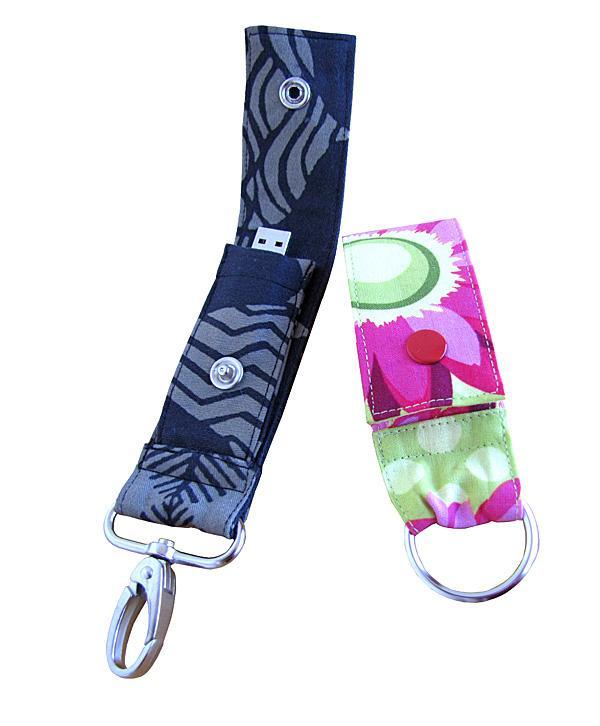
USB Key Fob sewing pattern

Photo via nicolemdesign

Sew: USB Key Fob

Know someone who’s always digging for a USB drive? Maybe it’s for personal reasons, maybe it’s for work. No matter how your tech-friendly friend uses it, this key fob will be useful. Sew one up in your friend’s favorite color.Get the USB Key Fob sewing pattern here.

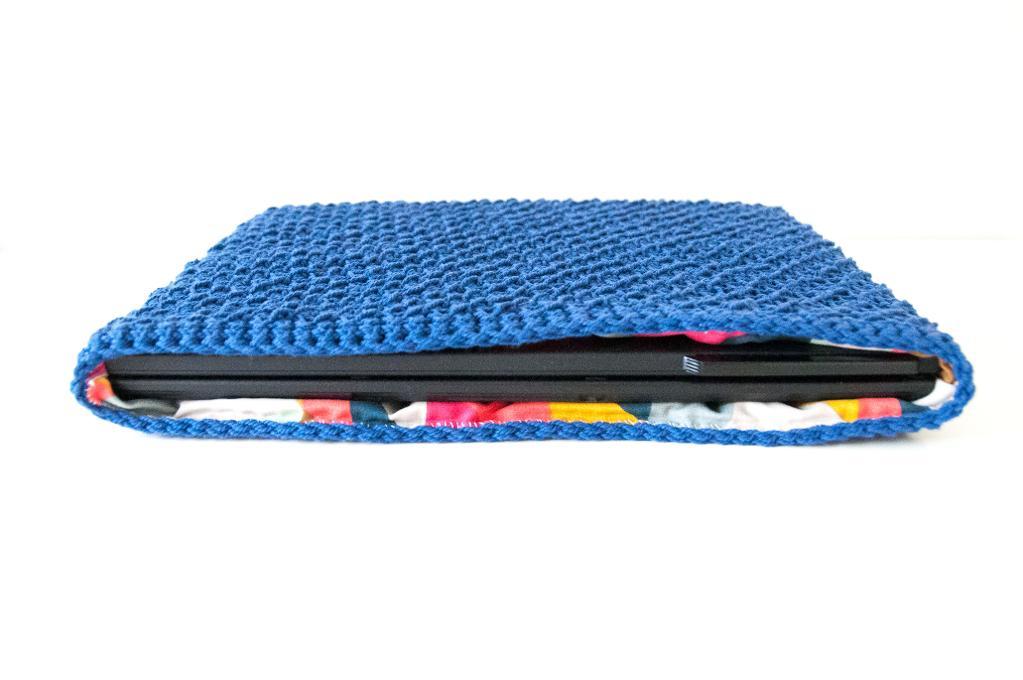
Crochet laptop cover crochet pattern

Photo via joyofmotion

Crochet: Laptop Sleeve

Even gift recipients who aren’t tech savvy probably own a laptop, tablet, or smartphone. How about stitching up a tech case for one of their many gadgets? This crochet sleeve works for laptops and can be resized to fit just about any technology out there.

.

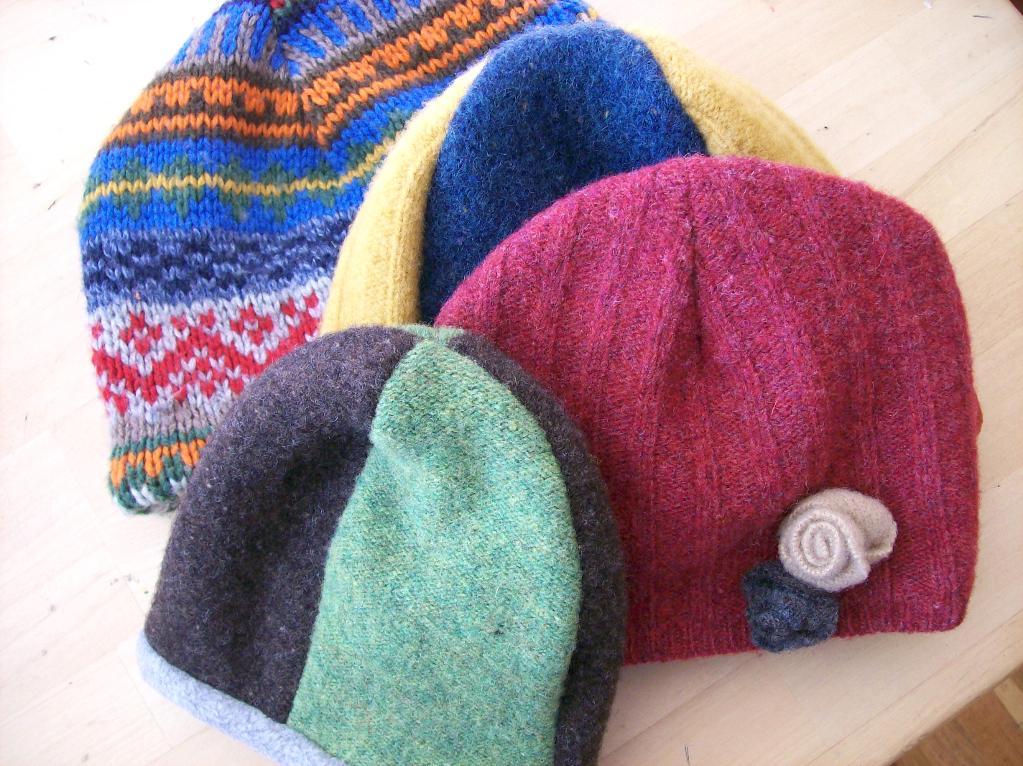
Recycled Sweater Hat

Sew: Recycled Sweater Hat

Shhh, no one has to know that these hats cost practically nothing. Grab some old sweaters from the drawer or purchase some at a second-hand store. Then cut those babies up into cozy warm hats that suit everyone on your list. You can even line them with fleece if you have time.

Get the Recycled Sweater Hat sewing pattern here.

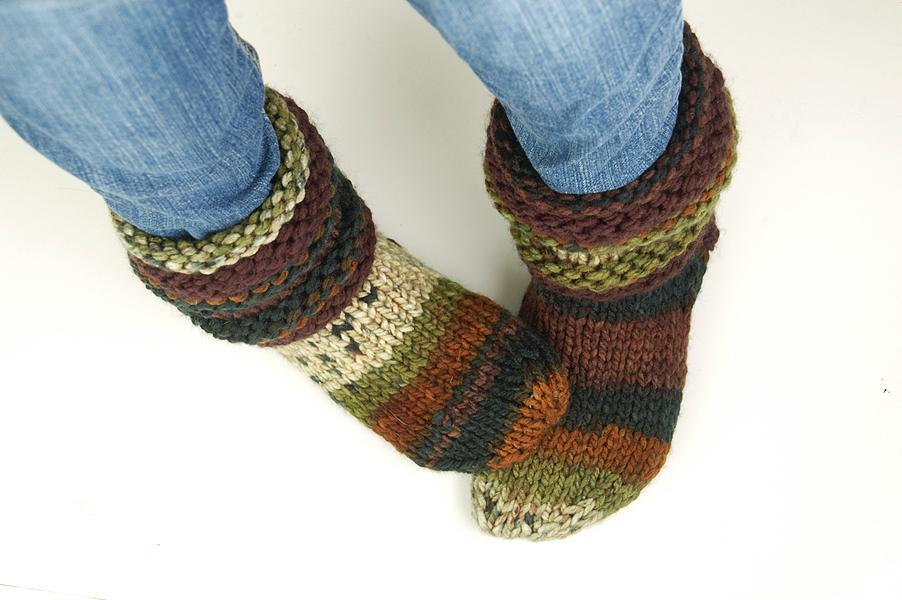
Cozy Feet Slipper Socks knitting pattern

Knit: Cozy Feet Slipper Socks

It’s the little luxuries that make the perfect gifts, and I think hand-knit slippers fall into that category. Everyone needs a pair of cozy slippers to pad around in. Would your lucky recipient rather have socks? Check out some of our sock knitting patterns for ideas

Make Your Own Knitting Stitch Markers

If you’re an experienced knitter, you probably already have stitch markers in your knitting kit. But what if you’re working on a huge project and you run out of knitting markers? What if you’re traveling or knitting in public and suddenly need a knitting marker? It’s time to get resourceful and learn how to make your own knitting stitch markers.

From markers that are as fancy as your favorite earrings to markers made from household items, there’s a way to make a knitting marker in almost any situation.

Snag-free stitch markers

These snag-free stitch markers are so pretty that they look like jewelry. It’s no surprise that they’re actually made using jewelry supplies like beading wire, crimping beads, and a crimping tool.

Twisted stitch markers

This collection of knitting markers isn’t just for marking your stitches. They also hold important information like directions (right, left, back, front) or specific instructions (slip, slip, knit) so that you can remember why you marked the stitch. Alphabet beads, sold in any craft store, help you out. You can customize the markers to say anything depending on the project you’re working on. When you’re finished, just untie the markers and reuse the beads for your next project.

Household items

You can grab a lot of items from around your home or even your local coffee house if you’re knitting in public. Try a few of these as stitch markers.

1. Paper clips:

Bend and shape paper clips to slide over the needle. Try to choose smoother clips, as ridged clips can get stuck on your yarn.

2. Yarn:

Make a slip knot on a small piece of scrap yarn, leaving an opening big enough for your needle to slide through. This is especially handy if you knit while traveling. You can also cut this little piece from the opposite end of the skein you’re working with.

3. Straws:

Cut up the straw into tiny fragments and slide them onto the needle as markers.

4. Floss:

Floss might be difficult to see depending on the color and type you use, but it still gets the job done.

5. Safety pins:

Most of us have safety pins hanging around. (I even keep them in my wallet for clothing emergencies.) Be careful when using them as a knitting marker, as yarn can sometimes get caught in the closure and snag.

6. Old jewelry:

Put old jewelry to use as the most beautiful knitting markers you’ll ever see. Clip-on earrings and rings work especially well.

10. Embroidery floss:

This is already in most crafters’ supply stashes. Choose a color that contrasts your yarn so the marker will be more visible.

11. Jewelry findings:

Closures like toggles and jump rings can be slid onto your work just like a store-bought stitch marker.

Caught in a bind and don’t have anything on this list? Look around you for any object that’s small and round. If that’s not an option, just find some type of string or thread that will tie right onto your work.

Crochet Thursday: Crocheted Hat Tutorial

A lot of people claim that crocheting is faster than knitting, and I tend to agree with them. So now that all of a sudden there’s a bit of a fall nip in the air, I figured a quick crocheted hat for my 1-year-old son was in order. If you’ve been looking to learn how to crochet a hat, you’ve certainly come to the right place

This pattern for a quick, cozy crocheted hat is more of a recipe

Supplies

  • Worsted weight yarn
  • I (5 mm) hook

Abbreviations

  • sc: single crochet
  • dc: double crochet
  • ch: chain
  • sl st: slip stitch

Not sure of the terminology? Take a look at our handy guide to crochet abbreviations.

Pattern

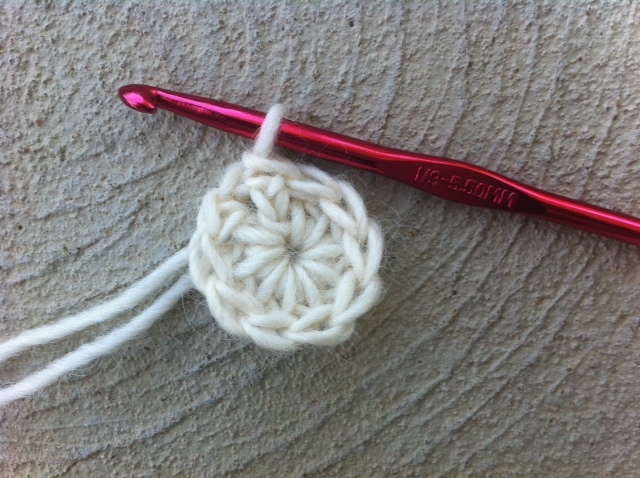
Chain 4, sl st into first ch, joining to form a ring.

In-the-Round Crochet Stitching on Hook

Round 1:

Chain 3 (counts as first double crochet here and throughout pattern), work 9 dc into ring, join with sl st to top of first ch 3.

Round 2:

Ch 3, dc in same st as joining, 2 dc in each st around, join with sl st to first ch 3 – 20 sts.

Round 3:

Ch 3, 2 dc in next st,*dc in next st, 2 dc in next st; repeat from * to end,  join with sl st to first ch 3 – 30 sts.

Round 4:

Ch 3, dc in next st, 2 dc in next st, *dc in next 2 sts, 2 dc in next st; repeat from * to end,  join with sl st to first ch 3 – 40 sts.

Round 5:

Ch 3, dc in next 2 sts, 2 dc in next st, *dc in next 3 sts, 2 dc in next st; repeat from * to end,  join with sl st to first ch 3 – 50 sts.

Round 6:

Ch 3, dc in next 3 sts, 2 dc in next st, * dc in next 4 sts, 2 dc in next st; repeat from * to end,  join with sl st to first ch 3 – 60 sts.

At this point I stopped increasing each round. My son has a head that is about 19″ circumference and my hat was measuring 17.5″ circumference. The double crochet fabric will be plenty stretchy and I want the hat to be fitted, not loose. If you are making your hat for someone with a larger head, continue to increase 10 sts per round until the circumference of the hat measures approximately 1.5″ less than that of the recipient’s head.

Round 7-10:

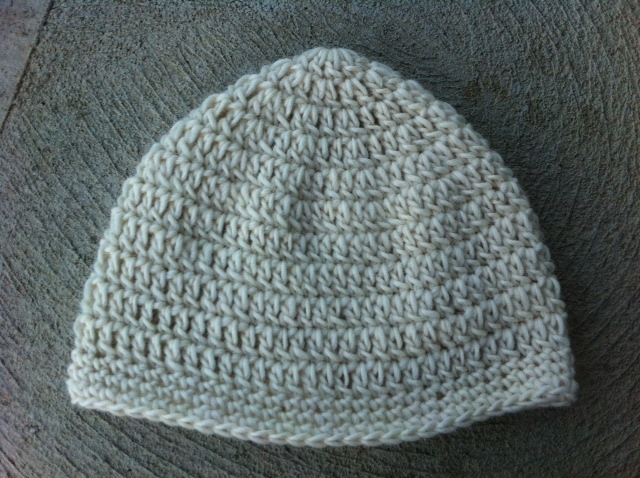
Ch 3, dc in each st to end of row,  join with sl st to first ch 3 – 60 sts.

Hat Crocheted Until Brim

Brim:

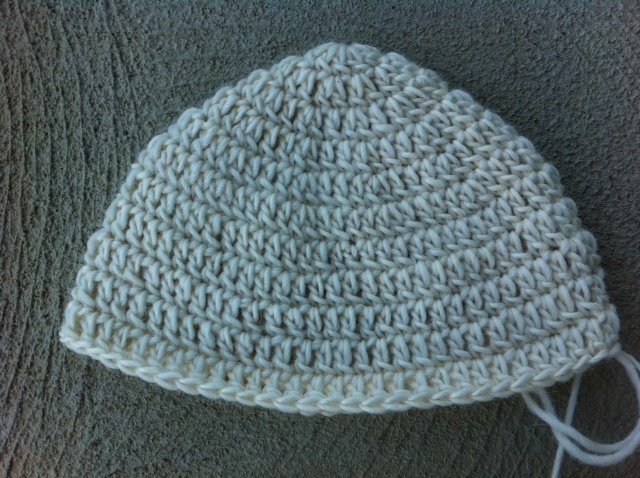
Ch 1, sc in each st to end of row, join to first sc with sl st.

Hat with Brim Crocheted

Repeat brim round 2 more times. Break yarn and fasten off.

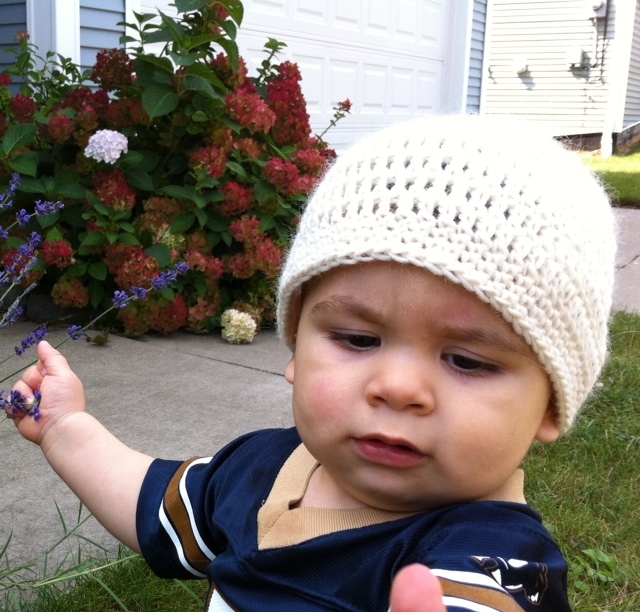
Toddler Wearing White Crocheted Hat

I’ve left my hat plain but am seriously considering adding a fun pom-pom in a contrasting color for a touch of pizazz. If you’re looking to add some embellishments as well, check out the Bluprint class Crafty Crochet Embellishments with Linda Permann.

Come back to the Bluprint blog tomorrow for Free Pattern Friday!

How to Knit Seed Stitch

The seed stitch is one of my favorite knitting stitches because it adds a texture to the knit that looks really complicated, even though it’s actually simple. If you know how to knit and purl , you’re ready to try seed stitch.

You might notice that British knitters refer to the seed stitch as moss stitch, which is even more confusing since American knitters have an entirely different stitch called the moss stitch. For our purposes, we’ll call it a seed stitch. If you happen to see a pattern by a British knitter that says it’s a moss stitch and looks like seed stitch, it’s probably this seed stitch.

This is the seed stitch as you’d find it written in a pattern:

Row 1 (RS) K1, *p1, k1; rep from * to end.

Rep row 1.

Understanding the seed stitch

The trick to the seed stitch is knowing when to knit and when to purl — you know, just in case you lose your place while knitting.

Once you’ve completed the first row, you’re going to be doing the exact same p1, k1 across the second row, except this time you’re going to knit the purls and purl the knits.

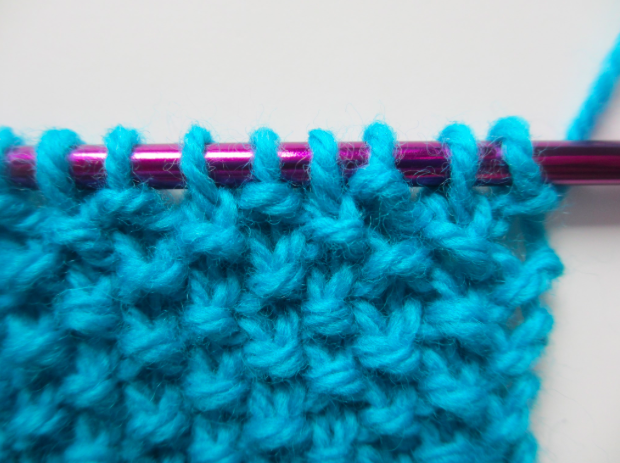
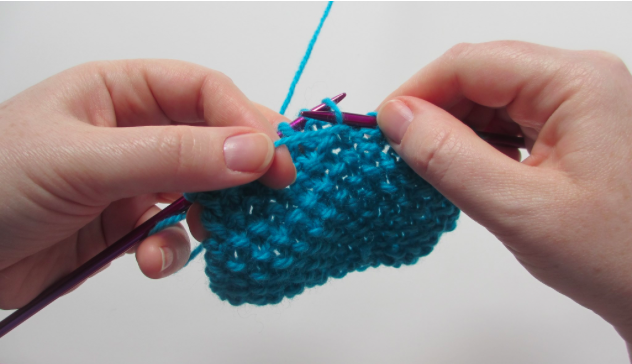
Say your house catches fire and you need to stop knitting. (You’ll run out of the flaming home with your knitting in tow, of course.) How can you tell what stitch you’re on? I always like using Debbie Stoller’s illustration from Stitch ‘N Bitch: The Knitter’s Handbook as an example. Debbie says that purl stitches —which have the rounded bump — look like they have a little noose around their necks, while knit stitches — which have the little V — look like they’re wearing a scarf. knit the seed stitch

Take a look at the difference in the photo above. Notice that the first stitch on the needle all the way to the right has the little noose around its neck. That’s a purl stitch.

The stitch beside it is wearing the scarf (the V) around its neck. That’s a knit stitch. Notice how the knit and purl stitches alternate across the needle in seed stitch.

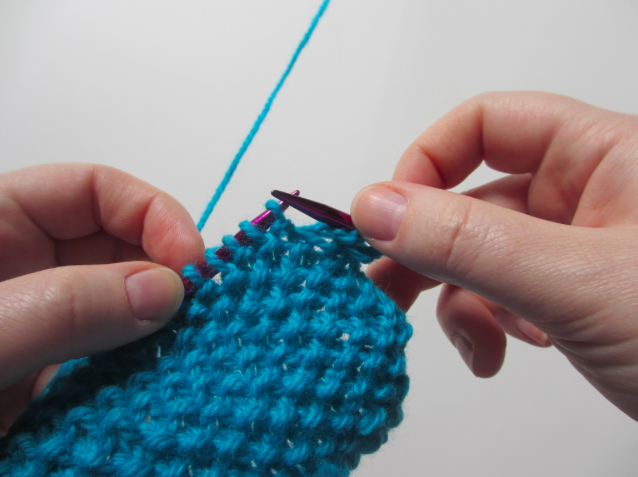
Knit the purls

Let’s say your knitting was interrupted. You picked up the work again, and the next stitch on the needle is a purl stitch. (We know it’s a purl because of the noose around its neck, right?) knit the purls

Remember that we knit the purls. So we’ll knit into that purl stitch. knit

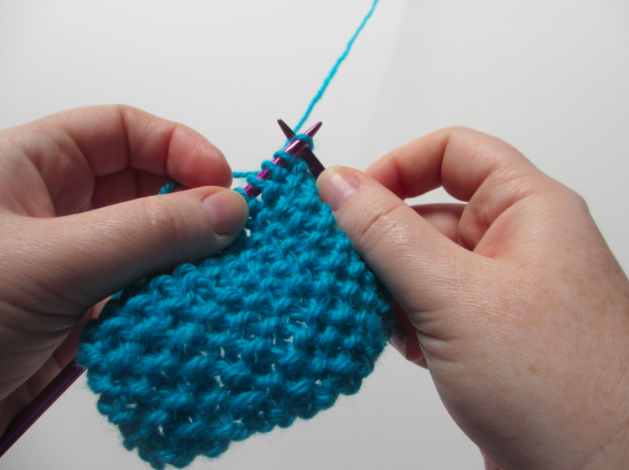
Purl the knits

Now let’s say you pick the knitting back up and see a knit stitch is next. (We know it’s a knit stitch because it has a little scarf or V around its neck.) purl stitch

We purl into the knit stitches, so when you see a knit stitch, purl. knitting

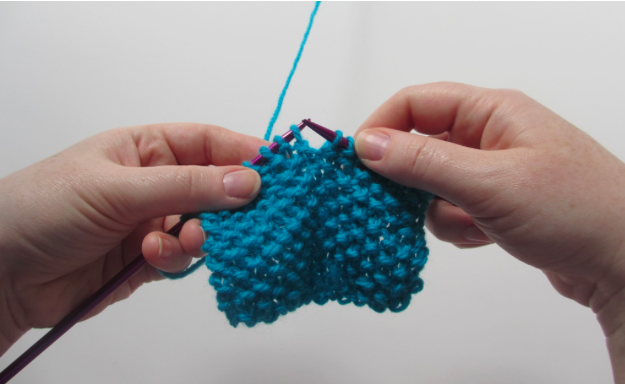
Pro Tip: If you’re new to working knits and purls in the same row, make sure you move your yarn under the needle when you switch between stitches: that way you won’t create an extra stitch by going over the needle.

How to Knit I-cord

The first time you came across the term I-cord in a pattern, you probably had two questions. First, how do I knit I-cord? And second, what does the “I” stand for? If a more experienced knitter told you the “I” stood for “idiot,” you probably didn’t believe her. But, yes, the “I” really does stand for idiot! The inventor was making a statement that this cord is so easy an idiot could make it.

Sometimes, instead of knitting a flat surface, you want something more like rope. That’s where I-cord comes in. I-cord creates a long, curling, round project that, as the name suggests, looks like a cord.

How to knit I-cord

i-cord knitting

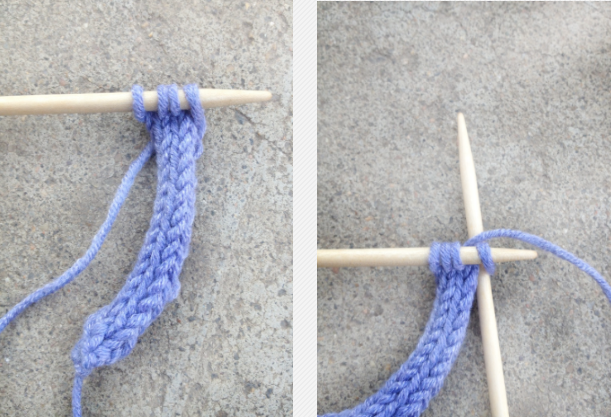
Knitting I-cord is really quite simple. First, you will need two double-point needles. I-cord generally uses somewhere between 3-5 stitches. After you’ve cast on, knit your first row of stitches, but then don’t turn your work. Instead, slide your stitches to the other end of the needle they’re on. (This is why you use double points.)

Now you’ve got the right side facing you and the working yarn at the left-most stitch on your left hand needle. Knit into the right-most stitch on your left hand needle, pulling the working yarn across the back of your stitches to begin the next row. This is the action that creates the closed-in cord appearance. Just keep repeating that process until your cord is the length you want it to be. Then bind off as usual.

How to knit an I-cord bind-off

You can also use I-cord technique to make a thicker bind-off edge. To knit an I-cord bind-off, start your bind off row by casting on two stitches (or more for a thicker cord). Then slip those two stitches from the right hand needle onto the left hand needle. Now to begin the bind off, knit a stitch, then do a slip, slip knit with the next two stitches. (However many stitches you knit before the decrease will be one fewer than you cast on at the start of the row.)

After the decrease, slip your stitches from the right hand needle back to the left purlwise and repeat the process. The I-cord bind-off can get a bit tedious, but the result is well worth it. For the bag pictured above (just a simple stockinette piece knitted in the round), using the I-cord bind-off makes a sturdier surface for the handles to connect to. It gives the top edge of the bag a little more structure.

How to use I-cord

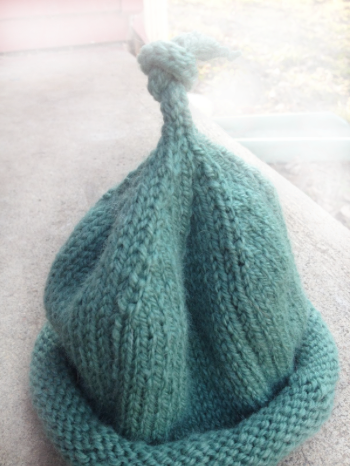
I-cord has many potential uses in knitting such as the handles on a bag, shoulder straps on a tank top, or ties on a baby hat. hat

Or you could create super cute necklace or make a decorative addition to any project using I-cord, like this baby hat. tree

And then there’s the coolest thing I’ve ever done with I-cord: this knitted Christmas tree. My knitting club made yards and yards of I-cord to cover every branch of this little tree (after a dutiful husband stripped all of the fake leaves off the branches, leaving us bare wire we could slip the I-cord over).

Now that you know the basics of how to knit I-cord, you can add it to anything. What knitting project will you add I-cord to?

Product has been added to your cart